Recently I had a requirement to install SSL certificate on Shared server. Although I worked with SSL installation on IIS over dedicated servers couple of time but this was a bit different experience to install it on shared hosting and that too using cPanel.
To have SSL on shared hosting two of mandatory things are:
1. A dedicated IP for our website which is hosted on shared server.
2. SSL certificate (obvious 🙂 )
Generally cPanel is provided with a shared hosting. In this case, on shared hosting a single IP is used for all the websites hosted in same server. SSL can only be installed on a dedicated IP so if you don’t have a dedicated IP, you can ask your hosting provider to provide one.
Once we have a dedicated IP assigned to our website getting a SSL is quite easy:
Step 1:
Login to cPanel and click on ‘SSL/TLS Manager’ in Security tab
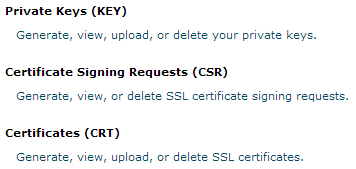
This will open SSL Manager from where we need to add and install SSL, primarily there will be only 2 options visible as below:
There will be one more option here but will appear on later stage.
Step 2:
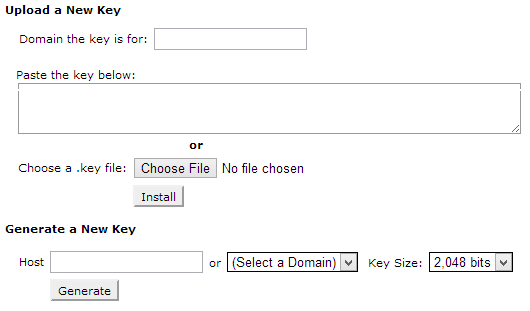
First you should create a new private key which will be used by SSL certificate. Select your domain name from drop down and click on Generate.
Step 3:
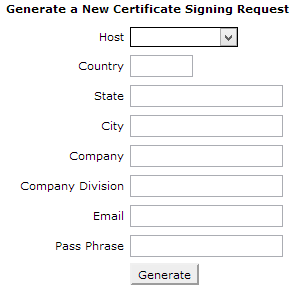
Now generate a certificate signing request. This CSR information will be required in process while requesting SSL certificate from your SSL provider. So all information need to be in correct format as well right.
Once you have this CSR, you can may request for a SSL certificate issue to SSL provider. If you are looking for a self-signed certificate you can go for Comodo 90 days free trial Once you have requested an SSL you will be receiving zip from your SSL provider containing two file a .CRT and .CA
Step 4:
Now as you have the certificate file, next step is to upload this certificate on website. Click on 3rd option ‘Generate, view, upload, or delete SSL certificates’ and upload the .CRT file received from SSL provider.
By this time you will be able to view 4th option in SSL Manager, if you are still not able to find it make installation done so far is correct.
Step 5:
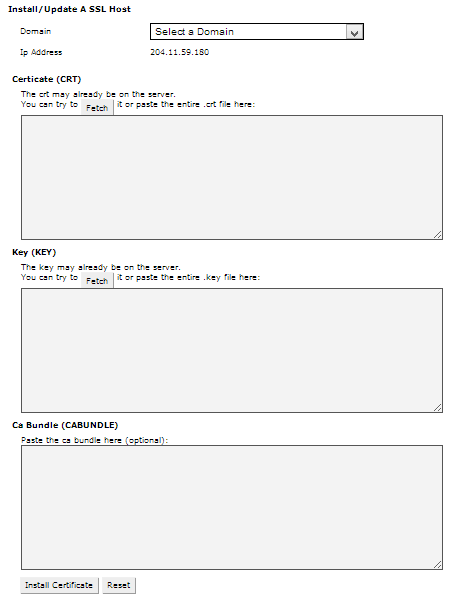
Now click on ‘Setup a SSL certificate to work on your site’, this will open a new page. Select your domain from dropdown, this will pre-fill all fields with your certificate date. Once done , click on Install certificate.
Cheers, you site is more secure and trustworthy for your customer. Go and start using https://yourdomainname.com
